
Install Pipeline On by platform
Install Pipeline On by platform
Use this guide when you already copied your Pipeline On ID tag and need to add it to your website builder, CMS, or tag manager.
Your ID tag is the one-line website tag shown inside Pipeline On. It starts with the Pipeline On script URL and includes your site-specific data-po-tag value.
Copy the real tag from Pipeline On. Do not rebuild it by hand.
Before you start
- Open Pipeline On.
- Go to the Install page for your site.
- Copy the full ID tag exactly as shown.
- Add it once, globally, so it loads on every public page you want measured.
- Save and publish the website changes.
- Return to Pipeline On and click Verify tag.
If a web person manages your site, use the Send the code to my web person option from the Pipeline On install screen.
Google Tag Manager
Use this if your site already has Google Tag Manager installed on every page.
- Open Google Tag Manager.
- Choose the container for this website.
- Click Tags.
- Click New.
- Click Tag Configuration.
- Choose Custom HTML.
- Paste your Pipeline On ID tag into the HTML box.
- Click Triggering.
- Choose All Pages.
- Save the tag.
- Click Submit, then Publish.
Important: Preview mode does not update the live website. You must publish the container.
If your cookie banner controls Google Tag Manager, ask your web person whether the Pipeline On tag should fire only after the visitor accepts the relevant consent category.
WordPress
WordPress does not include a built-in global header code box on most sites, so the simplest route is a header/footer code plugin.
- Open your WordPress dashboard.
- Go to Plugins, then Add New.
- Search for WPCode.
- Install and activate WPCode.
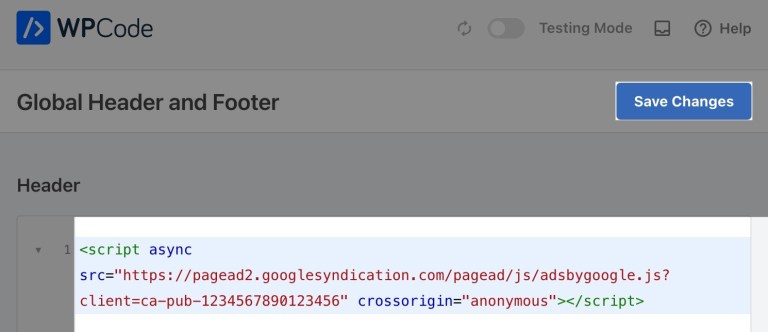
- In the left menu, open Code Snippets, then Header & Footer.
- Paste your Pipeline On ID tag into the Header box.
- Click Save Changes.
- Visit the public website in a fresh tab, then return to Pipeline On and verify the tag.
If your theme already has a global header scripts area, you can use that instead of WPCode. The important part is that the tag loads once on every public page.
Squarespace
Squarespace supports global code injection on Business and Commerce plans.
- Open your Squarespace site settings.
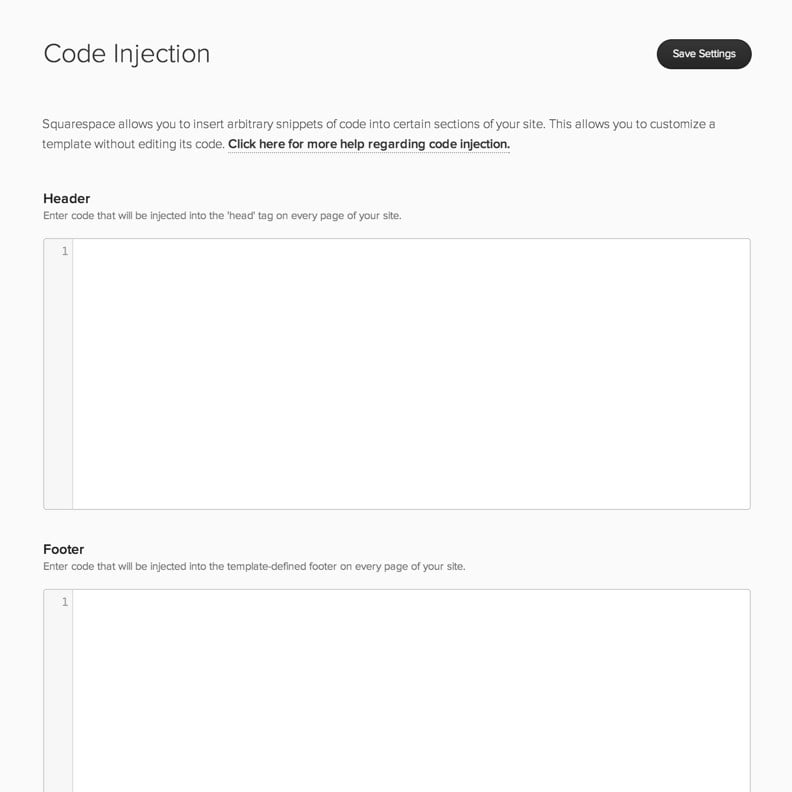
- Go to Settings, then Advanced, then Code Injection.
- Paste your Pipeline On ID tag into the Header box.
- Click Save.
- Open the live website in a fresh tab, then return to Pipeline On and verify the tag.
If the Code Injection screen is not available, check your Squarespace plan or ask your web person to install the tag another way.
Shopify
Use this for a standard Shopify theme install.
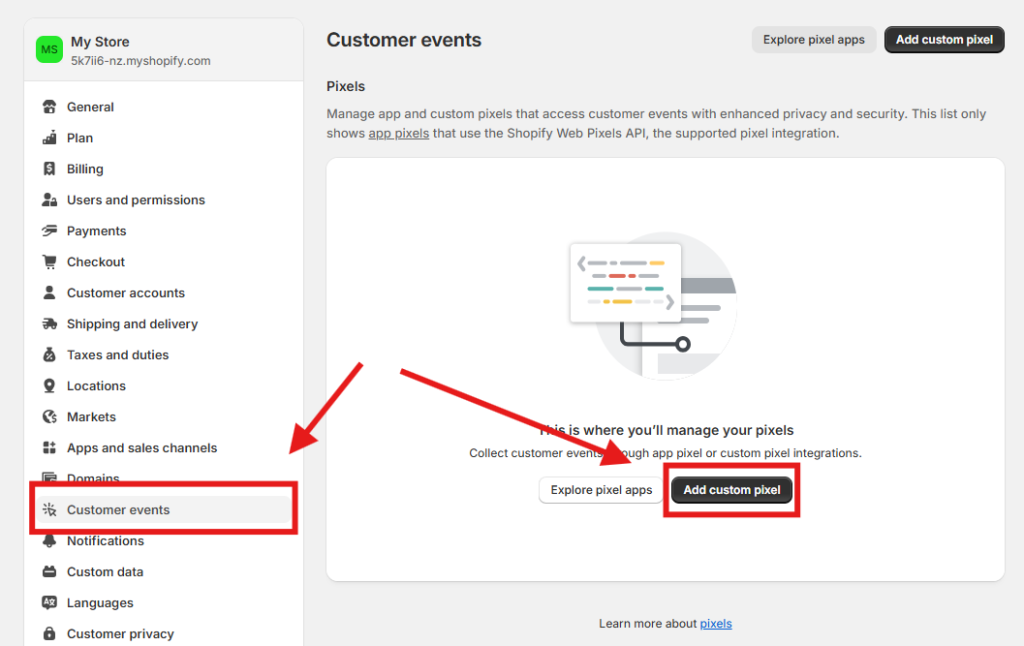
- Open your Shopify admin.
- Go to Online Store, then Themes.
- On your live theme, click the three dots.
- Click Edit code.
- Open
theme.liquidunder Layout. - Paste your Pipeline On ID tag right before the closing head tag.
- Click Save.
- Open the live storefront in a fresh tab, then return to Pipeline On and verify the tag.
Do not paste the tag only into checkout or a draft theme. It needs to run on the public storefront pages where visitors browse before calling or submitting a form.
Wix
Wix custom code requires a paid Wix plan with a connected domain.
- Open your Wix dashboard.
- Select your site.
- Go to Settings.
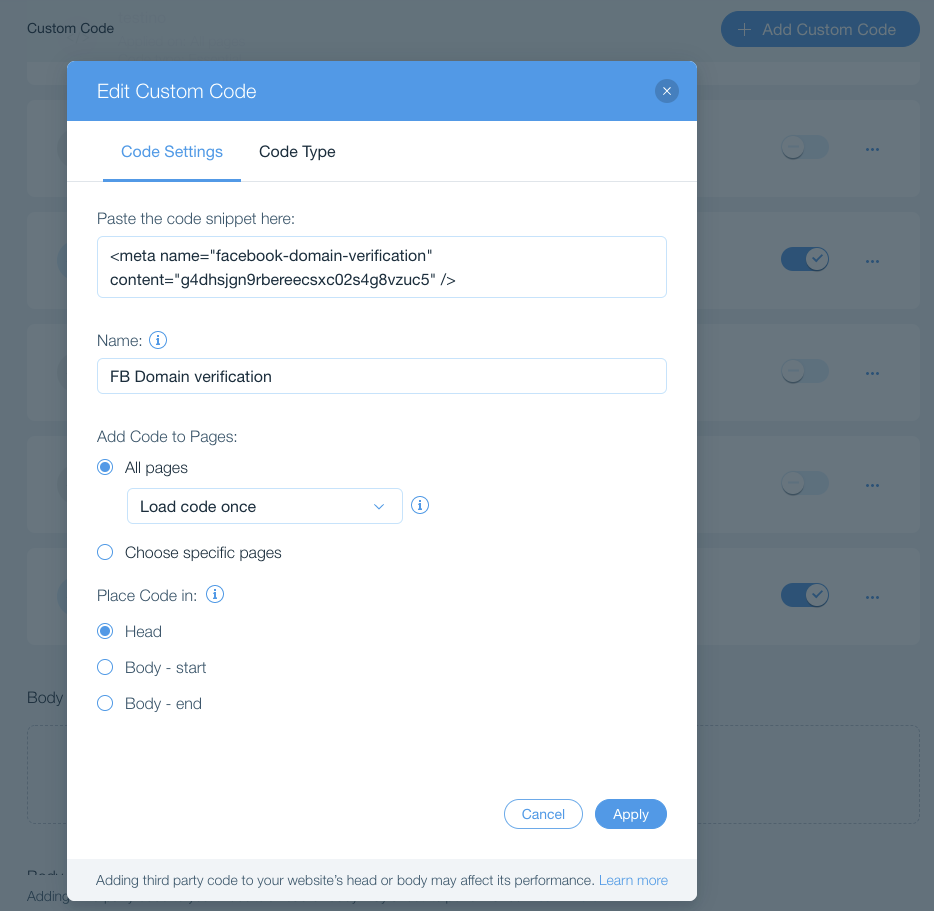
- Open Custom Code under Developer Tools.
- Click Add Custom Code.
- Paste your Pipeline On ID tag.
- Name it Pipeline On.
- Set Add Code to Pages to All pages.
- Set Place Code in to Head.
- Click Apply.
- Publish if Wix asks you to publish changes.
After that, visit the live site and verify the tag in Pipeline On.
Webflow
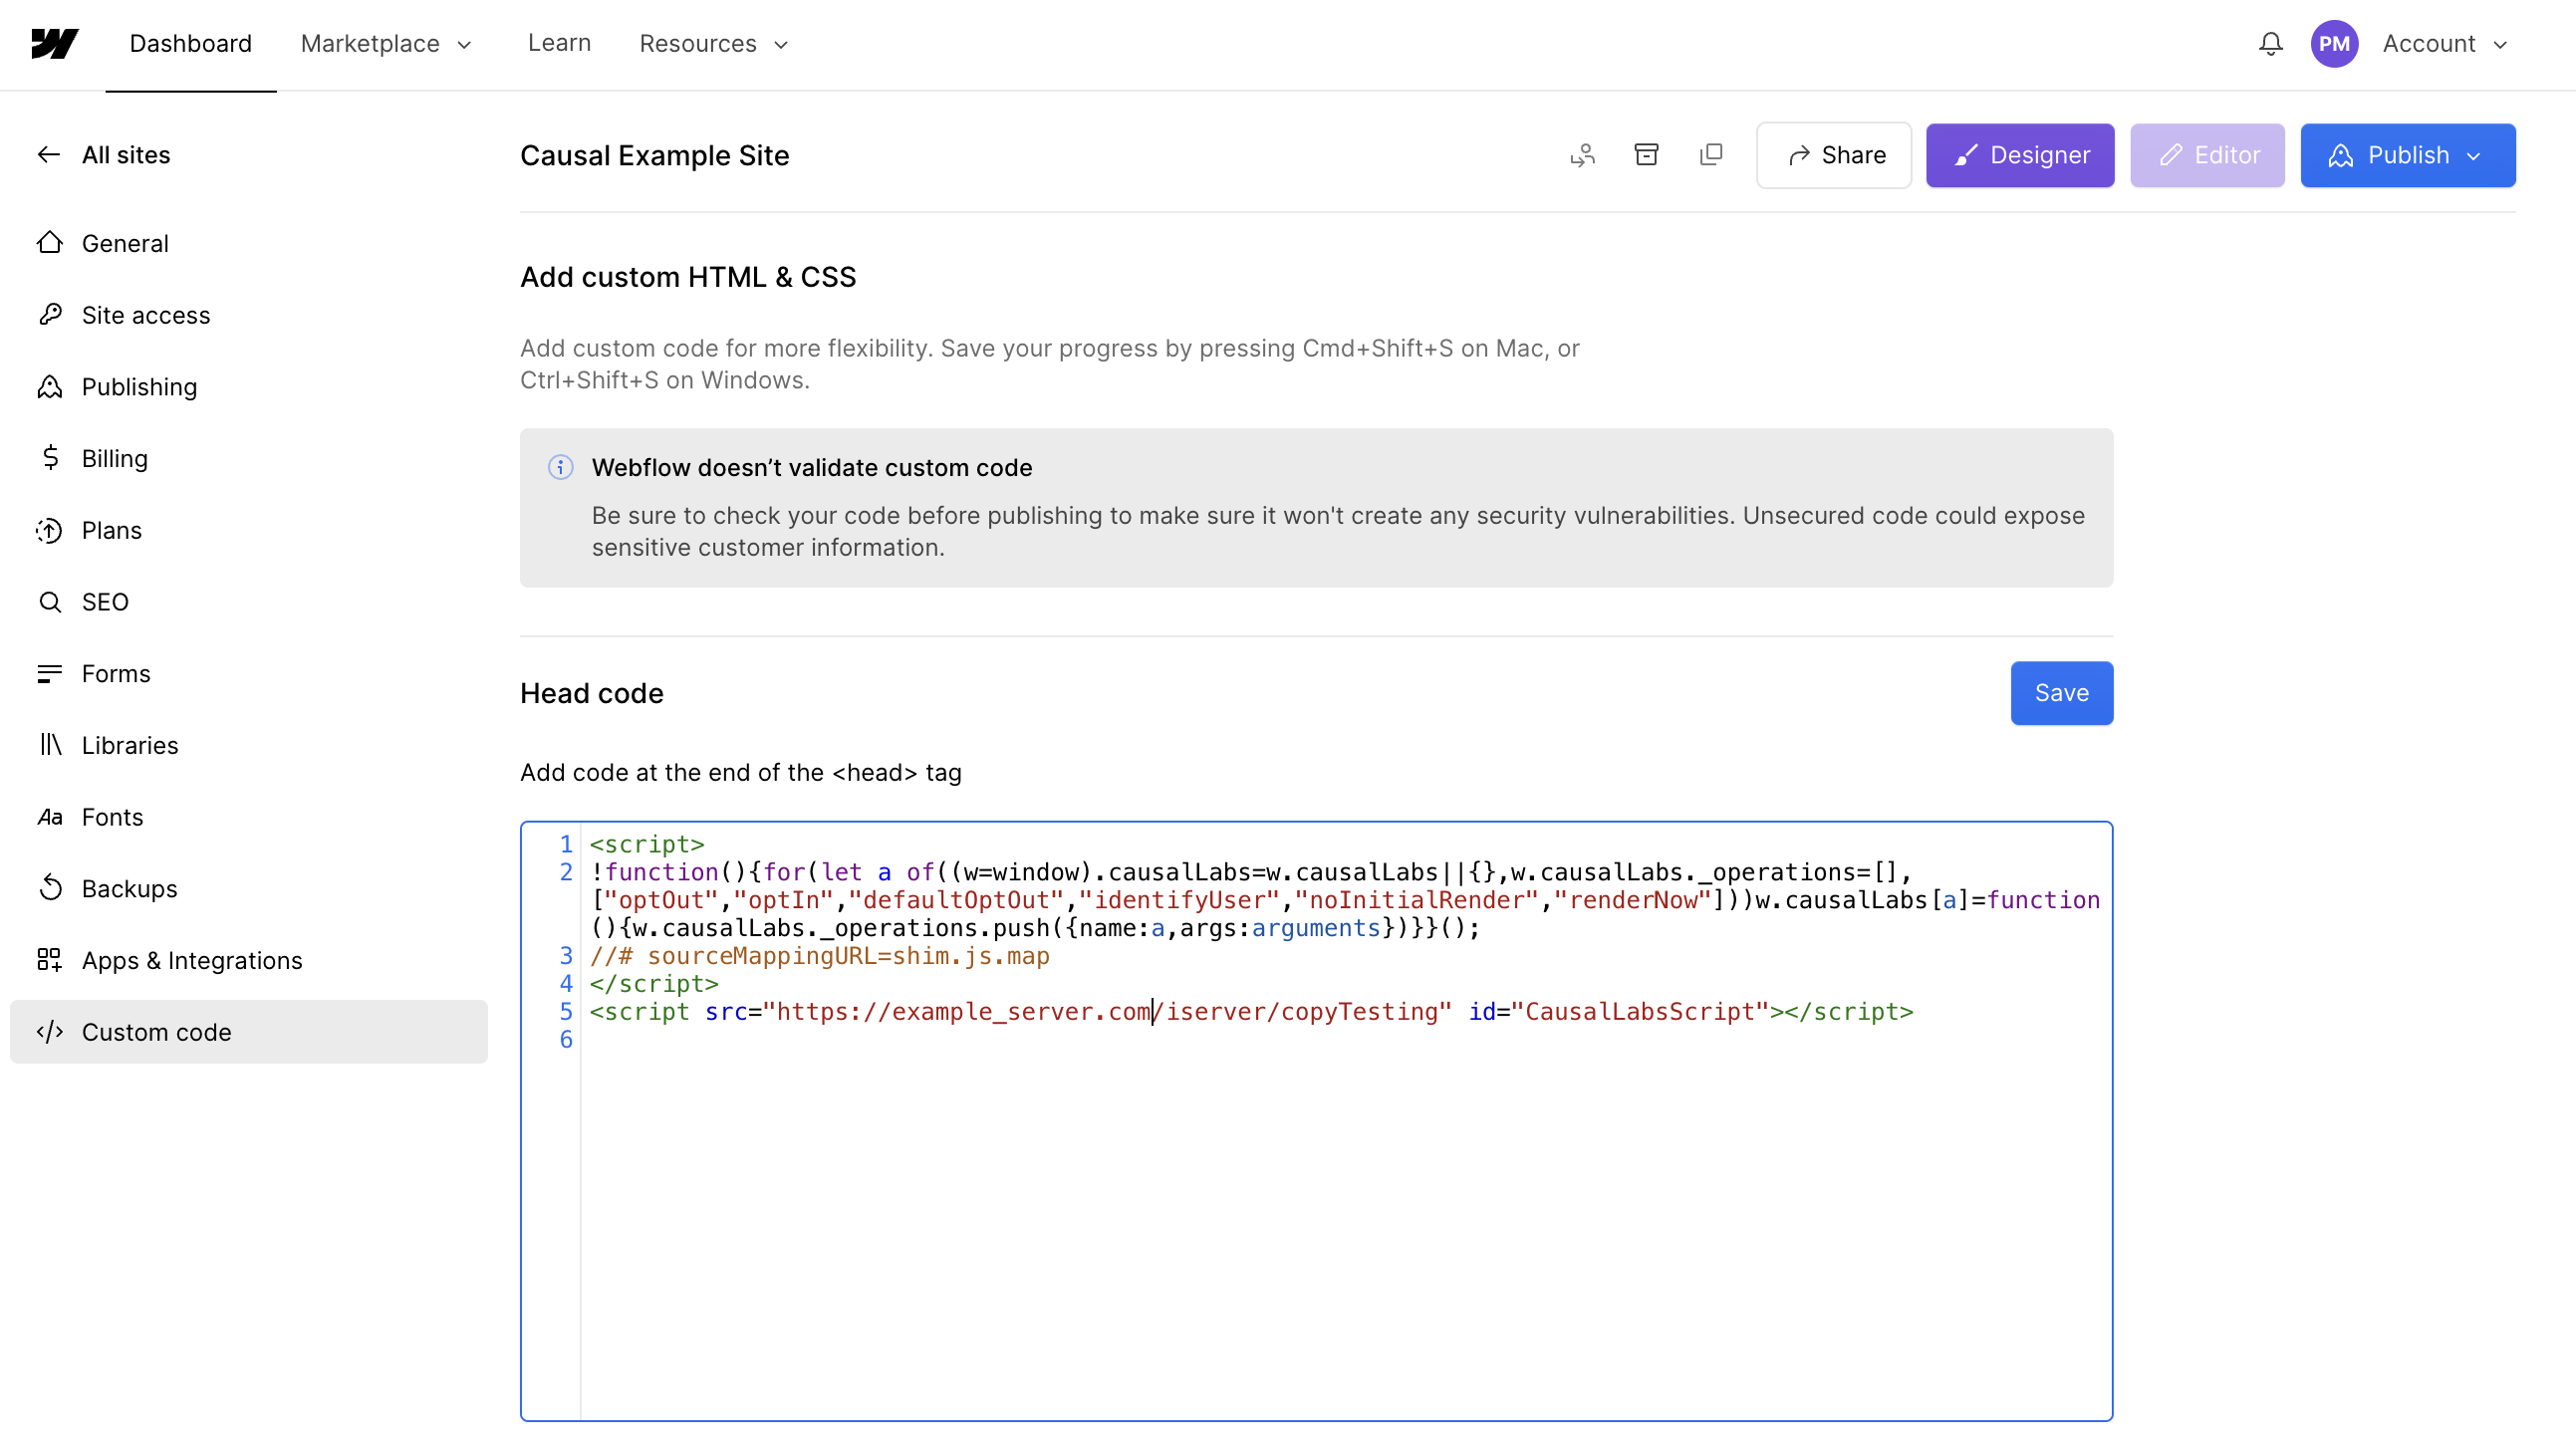
Webflow custom code requires a paid Site plan, and changes do not go live until you publish.
- Open your Webflow dashboard.
- Open the project for this website.
- Open Project Settings.
- Go to Custom Code.
- Paste your Pipeline On ID tag into the Head Code box.
- Click Save Changes.
- Publish the site.
- Open the live site in a fresh tab, then return to Pipeline On and verify the tag.
If the tag only appears in the designer preview, it has not been published yet.
Other website builders
Use the global custom code, header code, or sitewide head area in your builder.
- Open the website builder or codebase.
- Find the sitewide header, custom code, or head area.
- Paste your Pipeline On ID tag once.
- Save and publish.
- Visit the live website.
- Return to Pipeline On and verify the tag.
If you are using an AI agent, copy the agent prompt from the Pipeline On install page. It tells the agent to place the exact tag inside the sitewide head and report which file it changed.
What not to change
- Do not change
https://pp-n.com/p.js. - Do not change the
data-po-tagvalue. - Do not remove
asyncordefer. - Do not paste the tag more than once.
- Do not install it only on a draft, preview, checkout, admin, or staging page.
When to contact support
Contact support if the tag is installed on the live site, you visited the live site after publishing, and Pipeline On still does not verify it.
Include:
- Website domain.
- The exact page URL where the tag is installed.
- The platform you use, such as WordPress, Webflow, Shopify, Wix, Squarespace, or Google Tag Manager.
- A screenshot of where the tag was added, if available.